
A while ago, I wrote about how we integrate Okta and Auth0 using Auth0’s Social Connector (it runs OAuth2 behind the scenes). Today I will get into a bit more detail about how it’s done behind the scenes.
Our applications are registered directly with Auth0 as a “Regular Web Application”. This first layer of registration allows us to control application level authorization. In other words, only applications authorized by our platform can communicate with our backend.

The second level authentication and authorization that we do is at the user-level. This is where the Okta + Auth0 integration comes into play (there’s also Cerbos but we’ll get into that as a separate topic). The user is redirected to Okta to complete sign-in (enter your username, MFA, etc.) and then returned to Auth0 to continue with the login flow.
Auth0 then executes the Fetch User Profile script for that Social connector we configured to talk to Okta. In this script, the Auth0 runtime populates a number of parameters with useful return information from Okta. You get 3 things:
- the user’s access token
- a ctx or context object which gives you access to the id token
- and a callback, cb, for you to return a profile object to Auth0 that we use to construct the JWT
The access token is specific to the user who just completed the logon in Okta. We use this access token as part of the Authorization Bearer scheme to call the Okta OIDC UserInfo API (https://developer.okta.com/docs/reference/api/oidc/#userinfo). This allows us to fetch additional attributes about the user.
It is highly recommended to use an Okta custom authorization server for this purpose (https://developer.okta.com/docs/guides/customize-authz-server/main/). Why? Because the custom authorization server allows more control over the JWT that Okta mints (https://developer.okta.com/docs/guides/customize-authz-server/main/). It’s also possible to move some of the custom claims being generated in Auth0’s Fetch User Profile script to an Okta custom authorization server (it’s really up to you, but we prefer Auth0’s approach because Okta’s expression language pales in comparison to raw Javascript :) )
The return JSON from the Okta API call makes it very easy to parse properties and do additional processing. For example, here is part of our Fetch User Profile script:
1function(accessToken, ctx, cb) {
2function get_user_profile()
3{
4request({
5url: "https://<our okta domain>.okta.com/oauth2/<id of our custom auth server>/v1/userinfo",
6method: "GET",
7headers: {
8"Authorization": "Bearer " + accessToken,
9"Content-Type": "application/json"
10}
11},
12
13function(e, r, b) {
14if (e) return cb(e);
15if (r.statusCode !== 200) return cb(new Error('StatusCode: ' + r.statusCode));
16var profile = JSON.parse(b);
The code above is part of our Fetch User Profile script in Auth0. The profile object is what we return to Auth0 as part of our Fetch User Profile script. This object is used by Auth0 to create the user profile and issue a JWT. This can be done like so at the end of the script:
1cb(null, profile);To add a new claim to the JWT that Auth0 mints, all you have to do is to modify the profile object to your heart’s content. For example:
1profile.geo_ip_country = "Unknown";
2if (('geoipcountry') in idToken) {
3profile.geo_ip_country = idToken.geoipcountry;
4}
You will now have a claim called geo_ip_country in your JWT. What is idToken then? That is simply the user’s OIDC token and we can get that from one of the function parameter that Auth0 passes to us i.e. the ctx object:
1var idToken = jwt.decode(ctx.id_token);Now that you have both the access token and id token, you can manipulate the final JWT that gets issued! Oh, one more thing — how do you remove a claim? Easy as pie:
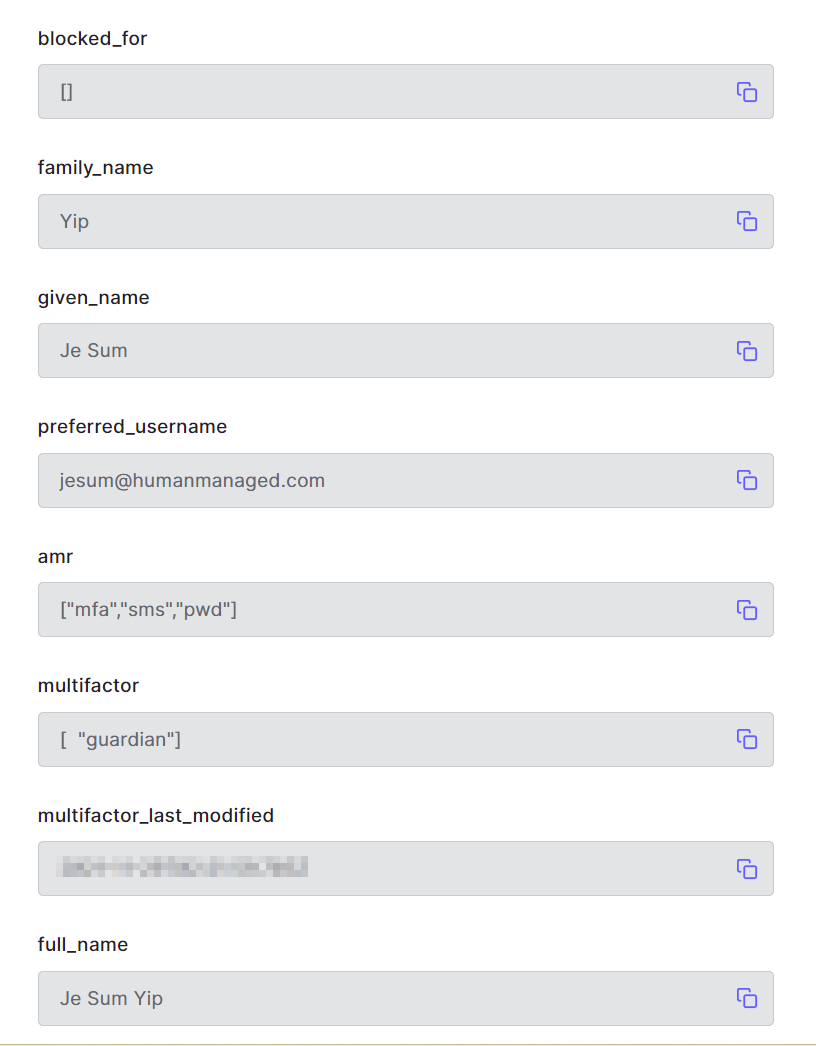
1delete profile.user_type;When you view your the JIT created user in Auth0, you will see something similar to the image posted below where each field is generated from the profile object that you manipulate. These fields can be used for 2 purposes — for auditing (you have a snapshot of the user the last time they logged on, so it’ really up to you what fields you want to populate for auditing purposes), and finally for JWT generation.
To get these fields added to the JWT token that Auth0 mints, you use another wonderful Auth0 feature called the login action flow (https://auth0.com/docs/customize/actions/flows-and-triggers/login-flow).
Here’s a sample of how you can do that:
1exports.onExecutePostLogin = async (event, api) =>
2{
3var ManagementClient = require('auth0').ManagementClient;
4var management = new ManagementClient
5(
6{
7domain: event.secrets.domain,
8clientId: event.secrets.clientId,
9clientSecret: event.secrets.clientSecret
10}
11);
12
13var params = { id: event.user.user_id };
14let user_attributes = await management.getUser(params);
15
16if ('geo_ip_country' in user_attributes)
17{
18api.accessToken.setCustomClaim("geo_ip_country", user_attributes['geo_ip_country']);
19}
If you need more information, feel free to reach out to us at Human Managed. :)